Setting up a Laravel Project on AWS Cloud9 with RDS
Table of Contents
- 1. Remove PHP5 and Install PHP7
- 2. Install Composer
- 3A. Setup RDS (if needed)
- 3B. Setup Local MySQL
- 4A. Setup Your App (For Existing Project)
- 4B. Setup Your App (For a New Project)
- 5. Git Config
Cloud9 is a fantastic environment for Laravel development, but getting it configured correctly can be a bit tricky. In this guide, we will walk through the steps to set up Laravel on Cloud9.
1. Remove PHP5 and Install PHP7
Let's start by removing PHP5 and installing PHP7. Open your Cloud9 terminal and run the following commands:
$ rpm -qa | grep php
$ sudo yum remove php56\*
$ sudo yum install -y php73
$ sudo yum install -y php73-mbstring
$ sudo yum install -y php73-pdo
$ sudo yum install -y php73-mysqlnd
2. Install Composer
Next, you need to install Composer. Run the following commands in your Cloud9 terminal:
$ curl -sS https://getcomposer.org/installer | php
$ sudo mv composer.phar /usr/bin/composer
3A. Setup RDS (if needed)
If you plan to use Amazon RDS for your database, follow these steps:
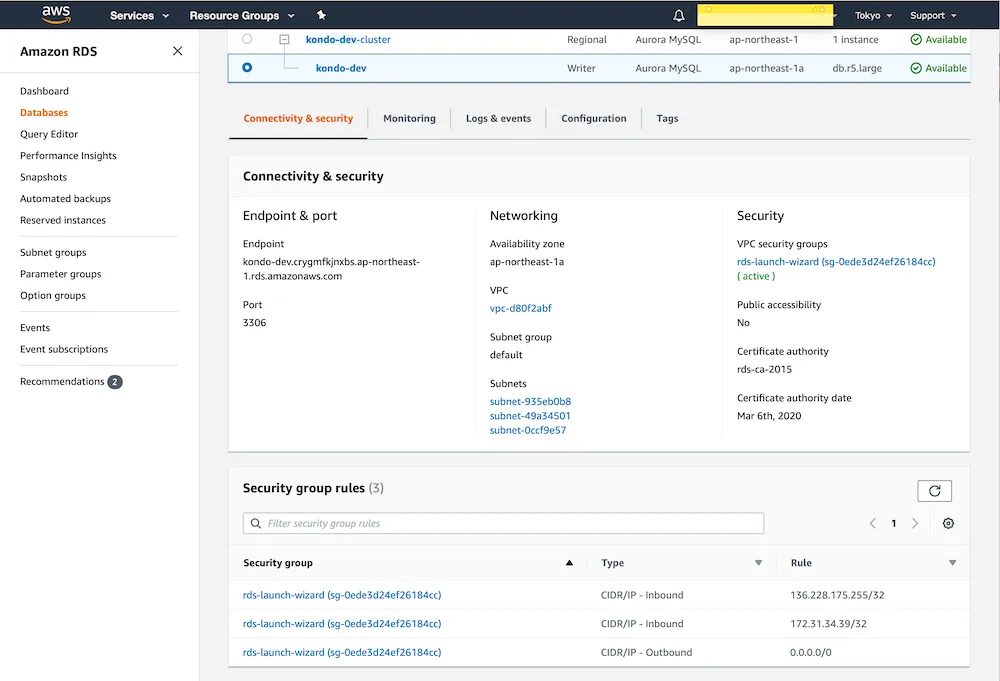
- Go to Services > RDS > Create database (Aurora + MySQL 5.7-compatible).
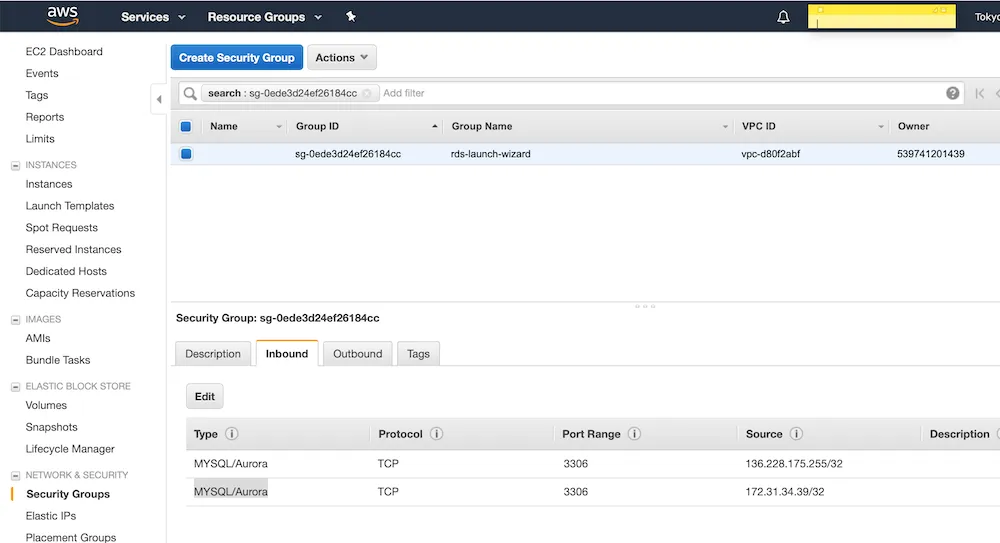
- Under Services > RDS > Databases (Writer) > VPC security groups, click Inbound > Edit (MYSQL/Aurora [YOUR EC2 LOCAL IP]/32).
- Create a database for your app by running the following command:

$ mysql -u [USER NAME] -h [WRITER DB ENDPOINT] -p
CREATE SCHEMA `[DBNAME]` DEFAULT CHARACTER SET utf8;
CREATE SCHEMA `[DBNAME]_testing` DEFAULT CHARACTER SET utf8;
3B. Setup Local MySQL
If you prefer to use the default MySQL instead of RDS, run these commands:

$ rpm -qa | grep mysql
$ sudo yum remove mysql55\*
$ sudo yum install -y mysql57-server
$ sudo service mysqld start
$ mysql -u root
CREATE SCHEMA `[DBNAME]` DEFAULT CHARACTER SET utf8;
CREATE SCHEMA `[DBNAME]_testing` DEFAULT CHARACTER SET utf8;
4A. Setup Your App (For Existing Project)
If you have an existing Laravel project, clone it and make the necessary configurations:
$ git clone [URL] laravel && cd laravel
$ cp .env.example .env
Edit the ".env" file with the following details:
DB_HOST=[Your DB endpoint]
DB_DATABASE=[Your DB name]
DB_USERNAME=root
DB_PASSWORD=root
Create a ".env.testing" file with the following content:
DB_HOST=[Your DB endpoint]
DB_DATABASE=[Your DB name]_testing
DB_USERNAME=root
DB_PASSWORD=root
Now, install dependencies, generate a key, and run migrations:
$ composer install
$ php artisan key:generate
$ php artisan migrate --seed
## or
$ php artisan migrate && php artisan db:seed
$ php artisan migrate --seed --env=testing
## or
$ php artisan migrate --env=testing && php artisan db:seed --env=testing
$ ./vendor/bin/phpunit
4B. Setup Your App (For a New Project)
For a new Laravel project, use the following commands:
$ composer create-project --prefer-dist laravel/laravel laravel
$ cd laravel
$ vi .env
5. Git Config
Set your Git configuration by running:
$ git config --local user.name "Your Name"
$ git config --local user.email your@email.com
These settings ensure your commits are associated with your identity.
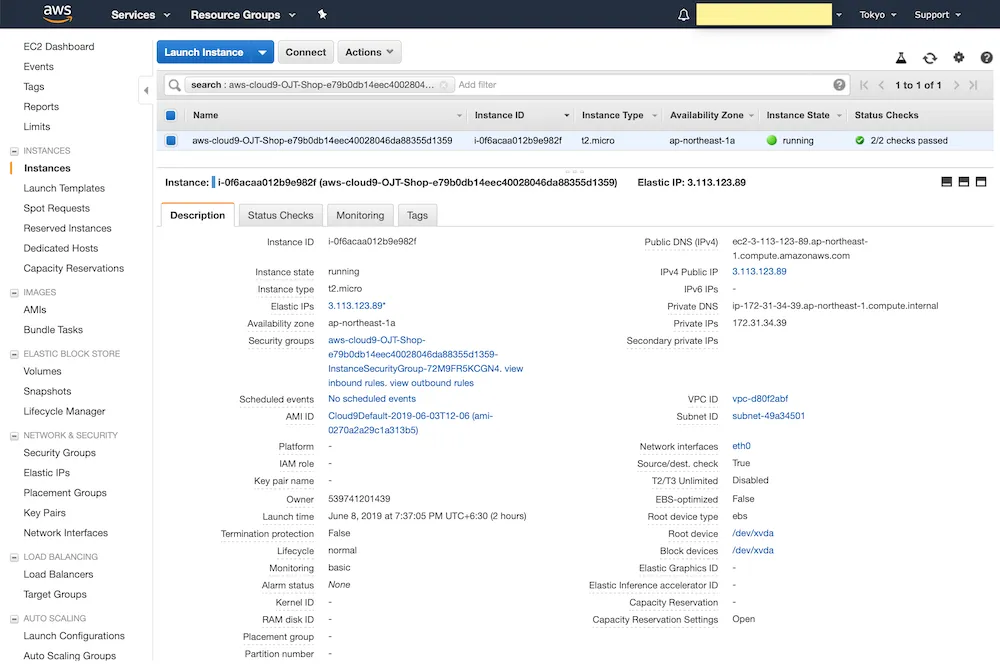
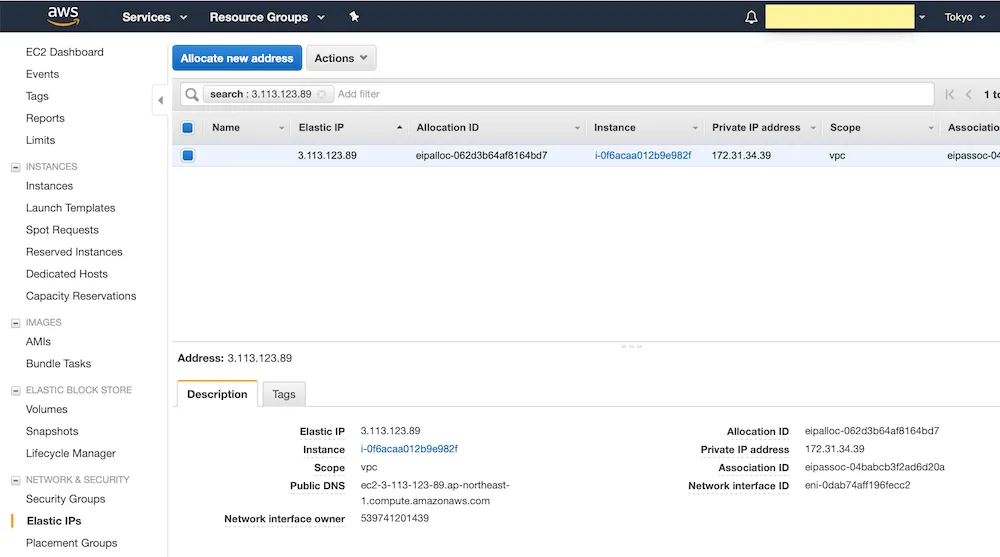
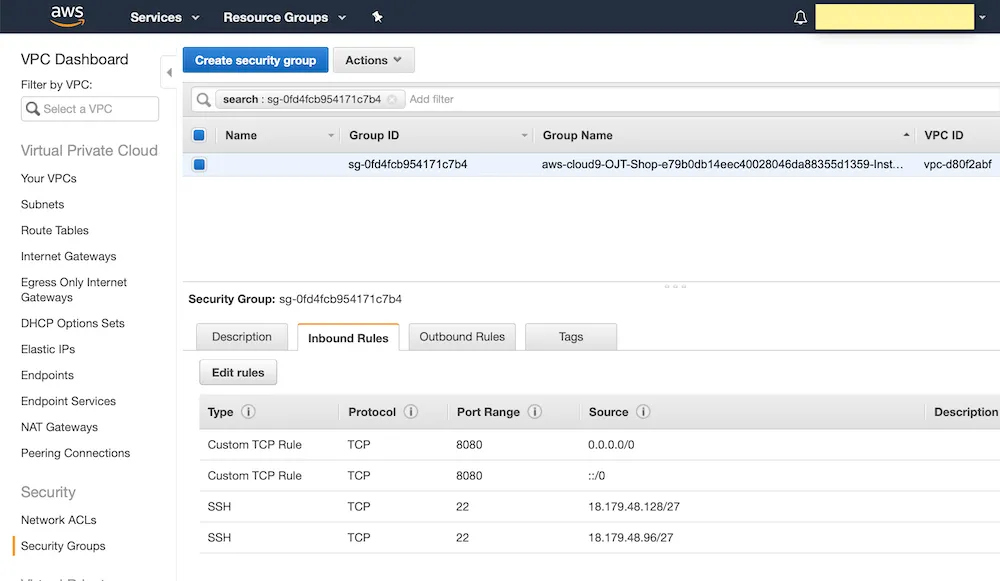
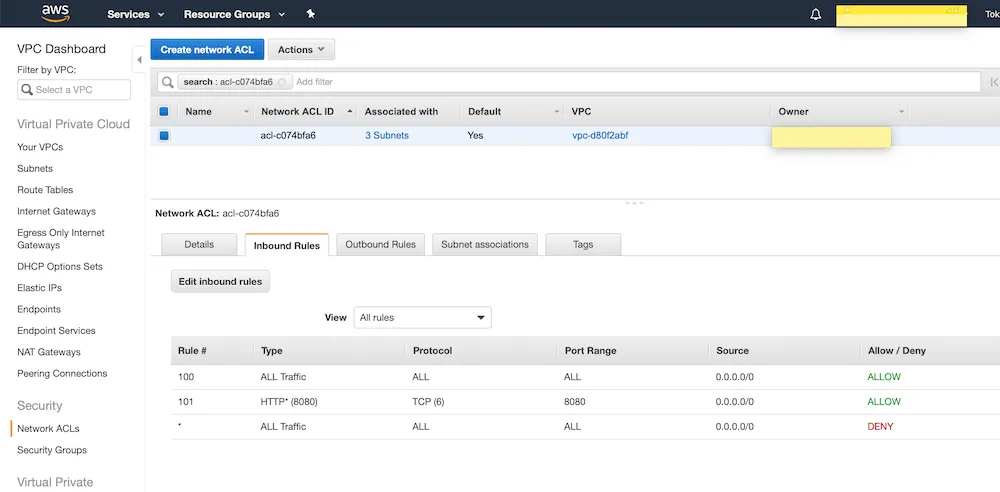
These are the essential steps to set up Laravel on Cloud9. Once you've completed these, you'll be ready to start coding and developing your Laravel application. If you need to share your app over the internet, there are extra steps you can follow, but they are optional.
For more details on sharing your app over the Internet, you can refer to the official Cloud9 documentation.
Happy coding! 🚀


Comments (0)
What are your thoughts on "Setting up a Laravel Project on AWS Cloud9 with RDS"?
You need to create an account to comment on this post.
Related articles


