
Install Redis on EC2 Instance
tooling
Table of Contents
AWS — How to Install Redis on EC2 Instance for Fast In-Memory Database
- All commands have been updated so that this article is up-to-date!
I have recently installed Redis on our web server at work and used it as the session engine in order to improve the performance of our web application. Redis successfully improved the session time by 99.97% compared to our old file engine. I’d like to share a quick and simple way to install Redis on your AWS EC2 server. If it is of interest to the audience, I will share a more complete and secure way to install, protect, and fine-tune Redis for production use.
Redis Logo (Image source: https://en.wikipedia.org/wiki/Redis)
Connect to your EC2 instance through SSH.
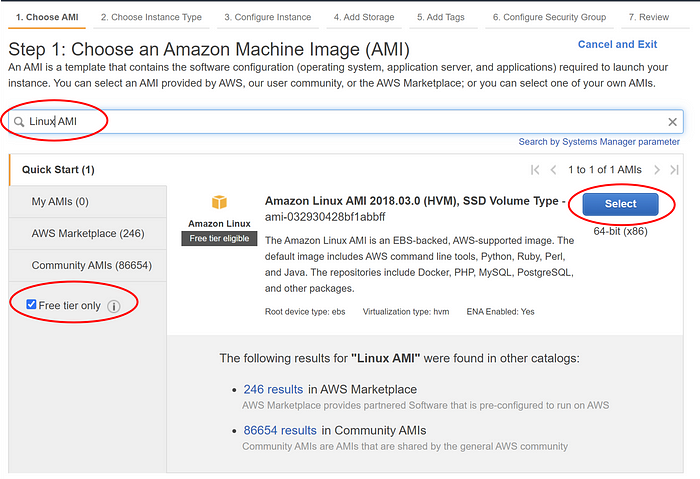
For demonstration purpose, I have created a free AWS Linux AMI instance. If you want some step-by-step details, please refer to section #2 in my other article AWS — How to Host a LAMP Web Application Server on AWS EC2 For Free.
Run the following commands line by line to install Redis and dependencies.
sudo yum -y install gcc make ### install GCC compiler
cd /usr/local/src
sudo wget http://download.redis.io/redis-stable.tar.gz
sudo tar xvzf redis-stable.tar.gz
sudo rm -f redis-stable.tar.gz
cd redis-stable
sudo yum groupinstall "Development Tools"
sudo make distclean
sudo make
sudo yum install -y tcl
Run a test and make sure Redis is correctly installed.
sudo make test It will take a couple of minutes to go through all the tests. But once it is done, you should be able to see a smile face, \o/, and a message saying “All tests passed without errors!” like below:

Copy both the Redis server and the command line interface (CLI) executables into proper places, using the following commands.
sudo cp src/redis-server /usr/local/bin/
sudo cp src/redis-cli /usr/local/bin/
Start Redis server. Just like MySQL server or Apache server, you need to start the server before it starts working.
redis-server
Once the server is started, you should see a message “Ready to accept connections”. At this point, you can close the terminal.

Open a new Terminal and connect to your EC2 instance again. Test Redis and play!
redis-cli
keys *
set session_id_1 'Hey World'
keys *
get session_id_1

AWESOME! You have installed Redis on your EC2 instance and can play with it for your application sessions, or page cache, or leaderboards, or your Pub/Sub etc..
For demonstration purpose, we have completed our goal. But before you use Redis on production, please consider a few more items:
- Configure Redis server using a config file instead of using all defaults. This allows you to :
- bind your server to specific IP or localhost (127.0.0.1) for security reason
- auto start Redis server (daemonize)
- specify port used by Redis (default is 6379, if you want to run multiple Redis instances, a different port has to be specified)
- set where a backup database can be stored
- Configure your EC2 server to
- auto-start Redis server at reboot
- fix performance warnings at the Redis server start page
Have fun!!
References:
https://redis.io/topics/quickstart
Comments (0)
What are your thoughts on "Install Redis on EC2 Instance"?
You need to create an account to comment on this post.